
-
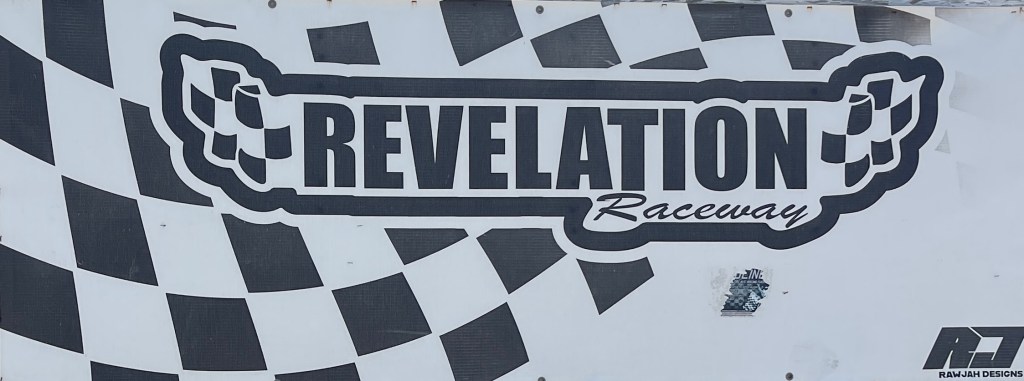 Continue reading →: Revelation Raceway 12-hour Endurance Race
12 Hours of Revelation Raceway Welcome to the first ever 12 Hour Endurance race at Revelation Raceway. If you attended the 12 Hours at Tamiya back in 2015, you’ll be familiar with the overall rules and procedures of our upcoming race. If this is your first time at an event…
-
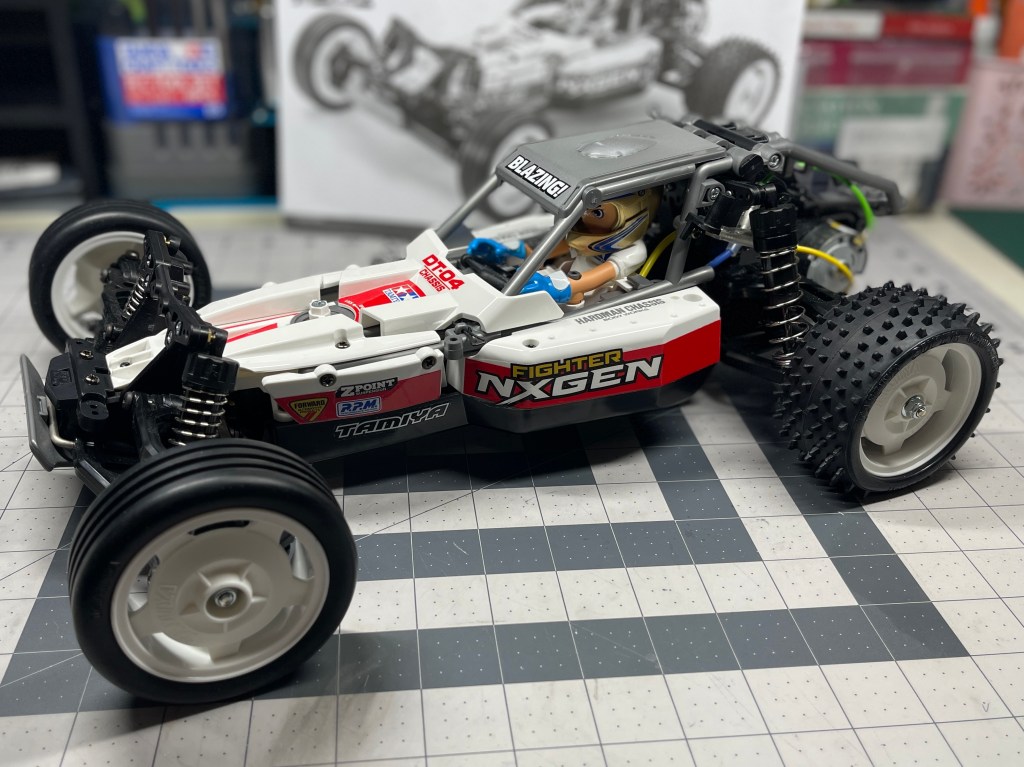 Continue reading →: Tamiya DT-04 Fighter NXGEN Wheels Guide (11)
Buy your Tamiya DT-04 Fighter NXGEN Putting on the wheels is the last step of building this kit. Cut out the front and rear wheels. Make sure to trim off any excess plastic. Stretch the front tire slightly and put the wheels straight in. Then stretch the tire again and…
-
 Continue reading →: Tamiya DT-04 Fighter NXGEN Decals Guide (10)
Buy your Tamiya DT-04 Fighter NXGEN Let’s finish building the chassis and apply the decals. Cut out the roof roll cage and body panel. Trim off the excess tabs as shown in the manual. Attach the body panel to the roll cage and fasten it with two screws from the…
-
 Continue reading →: Tamiya DT-04 Fighter NXGEN Driver Figure Guide (9)
Buy your Tamiya DT-04 Fighter NXGEN Let’s put together the Tamiya signature driver figure. This cartoonish mascot gives the buggy a fun look. It takes time to paint the parts but it comes together very quickly. Let’s start by cutting out all of the pieces of the driver figure. Leave…
-
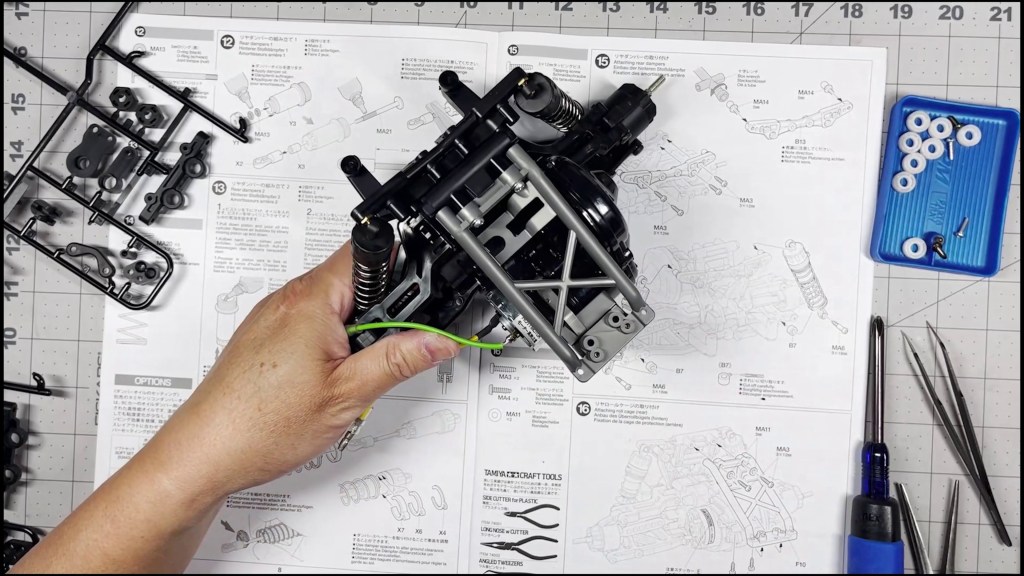
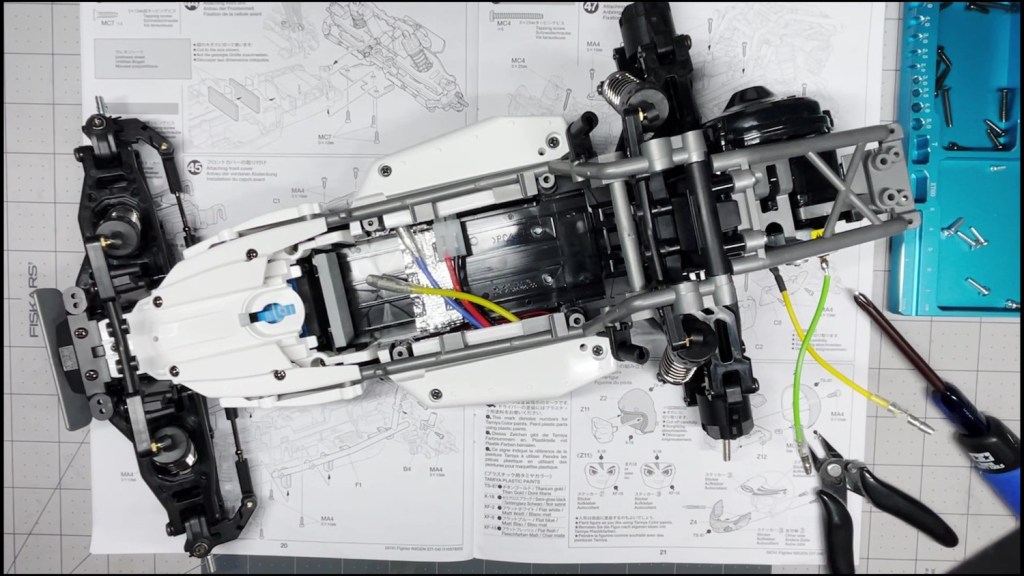 Continue reading →: Tamiya DT-04 Fighter NXGEN Chassis & Roll Cage Guide (8)
Buy your Tamiya DT-04 Fighter NXGEN We are going to attach the front and rear ends to the tub chassis. We will also attach the roll cage and several body panels. There are a lot of screws in the part of the build. An electric screwdriver is recommended. Let’s start…
-
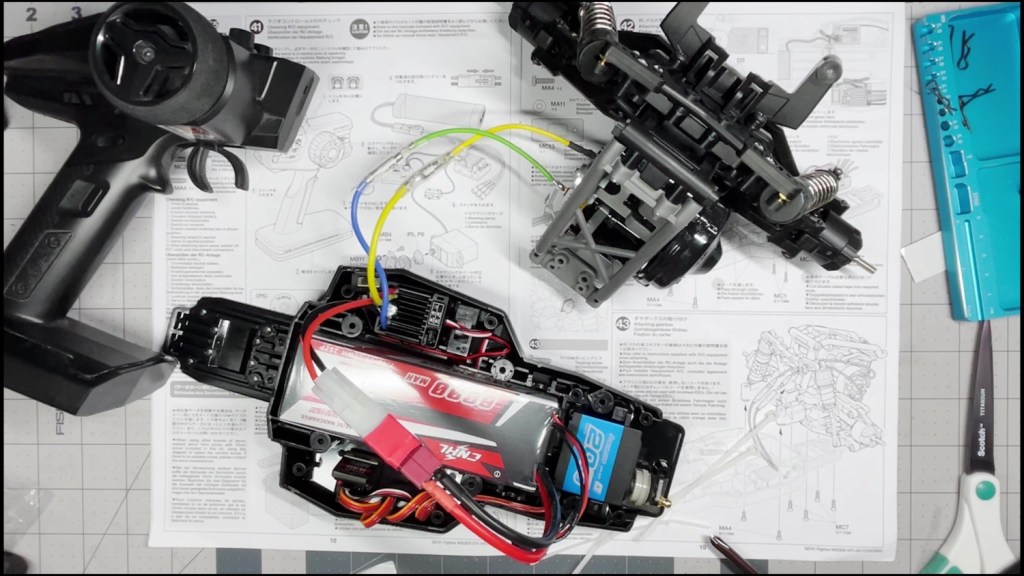 Continue reading →: Tamiya DT-04 Fighter NXGEN Electronics Guide (7)
Buy your Tamiya DT-04 Fighter NXGEN We are going to install the remaining electronics to the chassis. That includes the servo, electronic speed control (ESC) and receiver. We will leave affiliate links for electronics used in this article (or equivalent) in the footnotes. The servo is a piece of electronics…
-
 Continue reading →: Tamiya DT-04 Fighter NXGEN Front Damper Assembly Guide (6)
Buy your Tamiya DT-04 Fighter NXGEN We are going to assemble the front dampers and attach them to the chassis. This article will cover Steps 23 to 25 of the manual if we’re building the kit with the SHORT wheelbase setup. If we’re building the LONG wheelbase setup, the front…
-
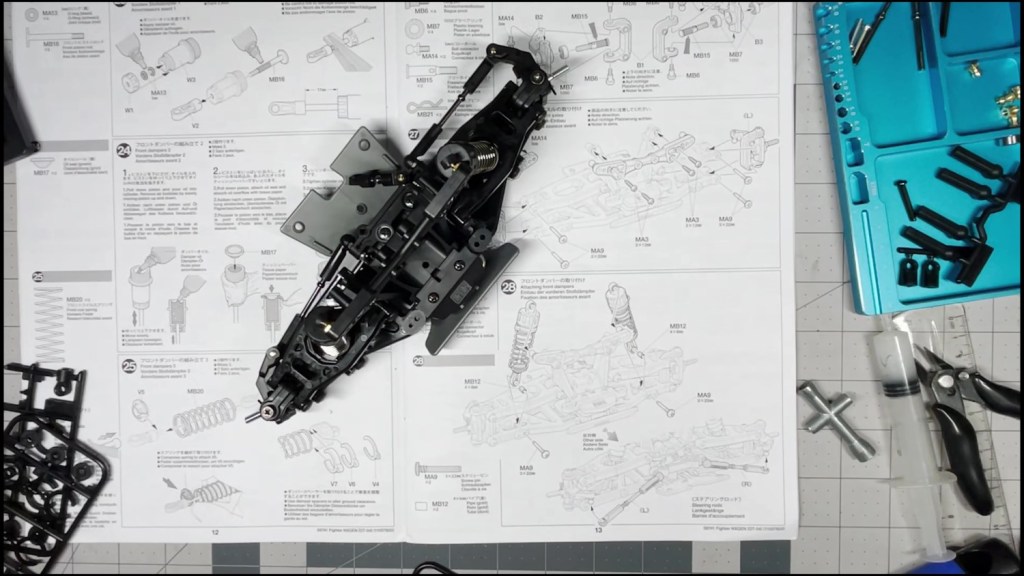
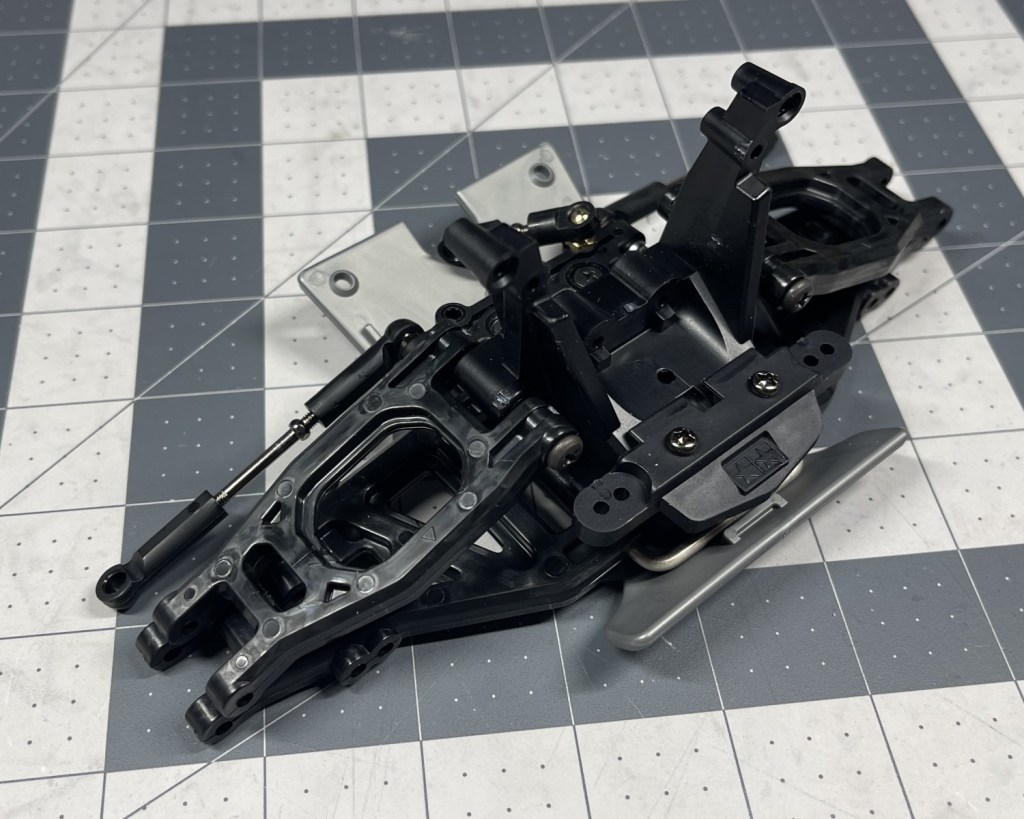 Continue reading →: Tamiya DT-04 Fighter NXGEN Front Arms Assembly Guide (5)
Buy your Tamiya DT-04 Fighter NXGEN We are going to attach the front upper and lower arms to the steering linkage assembly from the previous guide. This article will cover Steps 20 to 22 of the manual if we’re building the kit with the SHORT wheelbase setup. If we’re building…
-
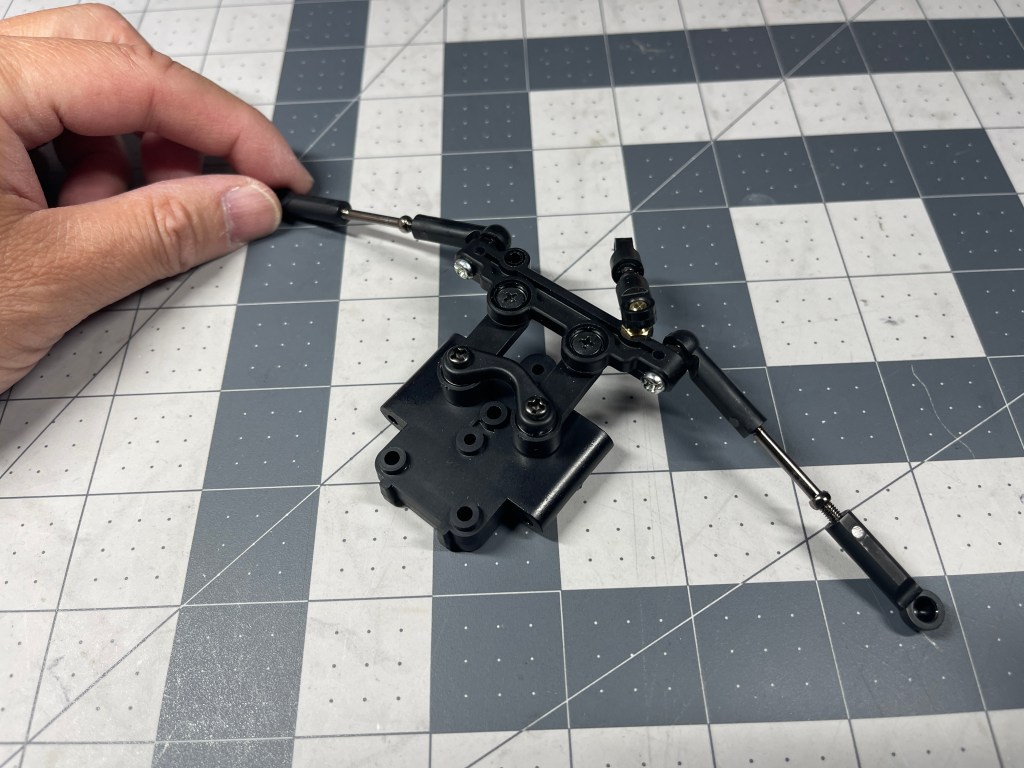 Continue reading →: Tamiya DT-04 Fighter NXGEN Steering Link Assembly Guide (4)
Buy your Tamiya DT-04 Fighter NXGEN We are going to start building the front end of the chassis. It starts with putting together the Steer Linkage assembly. This article will cover Steps 17 to 19 of the manual if we’re building the kit with the SHORT wheelbase setup. If we’re…
-
 Continue reading →: Tamiya DT-04 Fighter NXGEN Rear Damper Assembly Guide (3)
Buy your Tamiya DT-04 Fighter NXGEN If you have never built a set of Tamiya oil-filled dampers before, this could be your guide. This set that came with the kit is very basic. It shouldn’t give you any trouble if you follow these steps. This article will cover Steps 12…
Hello,
I’m RC’s RC Cars

Hi! Welcome to my blog. I make videos about RC cars. I love building RC car kits. Check out my YouTube channel for unboxing and build videos!
Let’s connect
Join the fun!
Stay updated with our latest tutorials and ideas by joining our newsletter.
